How to Restore Previous Versions of Files in Windows 10
In previous versions of Windows, saving over a file was a disaster (at least when it was unintended). Beyond System Restore, Windows had no built-in options for rolling back accidental changes to files. The original version of your file was lost unless you’d managed to save it with a new filename.
Realizing this was an issue, Microsoft introduced File History, a feature that allows you to roll back changes to your files, but there are alternatives if you’d prefer to use a third-party solution. To restore previous versions of files in Windows 10, here’s what you’ll need to do.
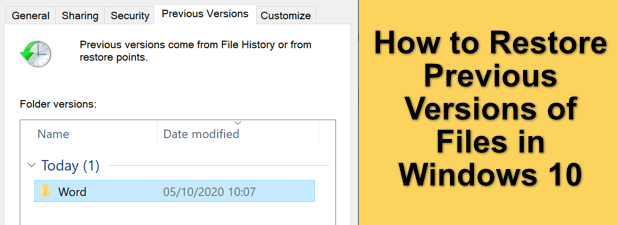
Restore Previous Versions of Files Using File History
If you want to roll back the changes to a file and restore a previous version, the best way to do it is to use Windows’ own file versioning features. You’ll need to have enabled File History first, which typically uses an external drive (or networked drive in some cases) to store the files.
If File History isn’t enabled, then you may not be able to restore a previous version in Windows 10 unless you’re already syncing your files to cloud storage.
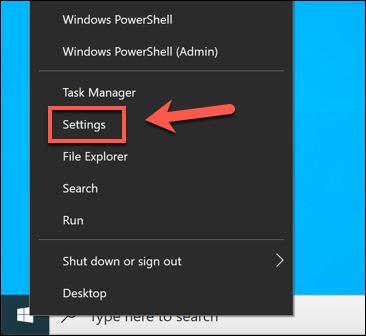
- You can check if File History is enabled in the Windows Settings menu. Right-click the Start menu and select the Settings option to begin.
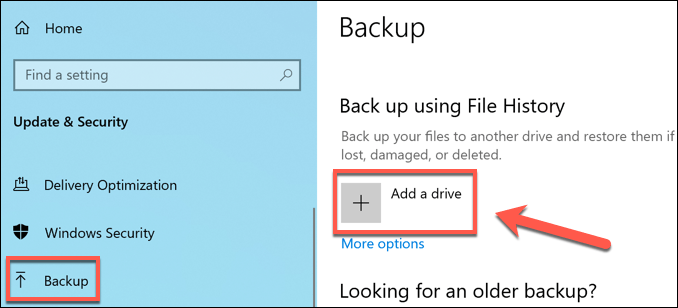
- In the Windows Settings menu, select Update & Security > Backup. Underneath the Back up using File History option, the drive you currently use for File History backups will be listed. If one isn’t listed, then you’ll need to enable File History by selecting the Add a drive option.
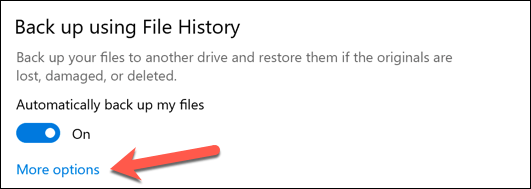
- A list of available external drives will appear in a drop-down menu. Select one of these to enable File History. The Backup menu will update with a slider allowing you to switch File History on and off once you’ve done this. You can select which folders it monitors by selecting More options underneath the slider.
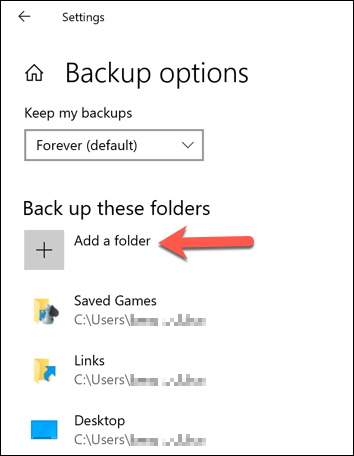
- In the More options menu, you can add or remove folders to monitor for File History by selecting the Add a folder option underneath the Back up these folders category.
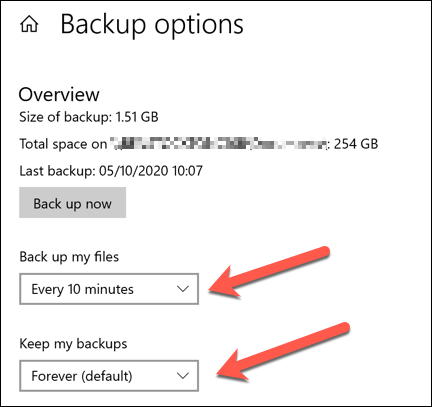
- You can also change how often files are backed up and how often the backups are stored for. To change these settings, change the settings using the Back up my files and Keep my backups drop-down menus.
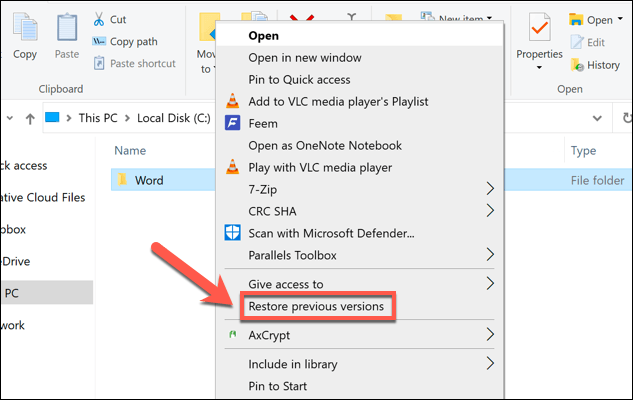
- Once File History is enabled and monitoring the correct folders, you can restore previous versions of files using Windows File Explorer. This will only work for files you edit after File History has been enabled. To do this, open File Explorer and find the file or folder containing the file you wish to restore. Right-click the file or folder, then select the Restore previous versions option.
- In the Previous Versions tab of the Properties window, you’ll see a list of previous versions of your file or folder. To view the file or folder, select the version you want to restore from the list, then select the Open button at the bottom. If you want to restore it, select Restore instead.
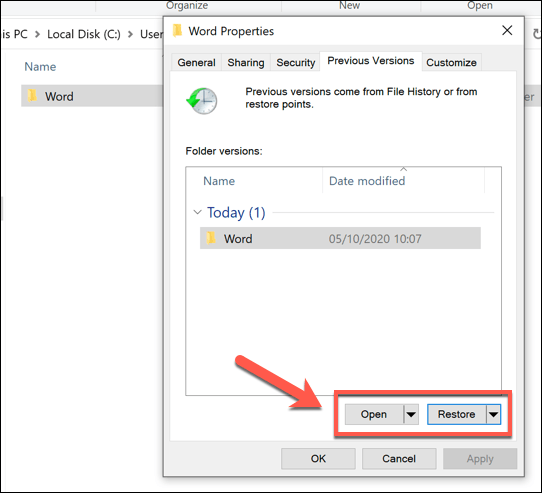
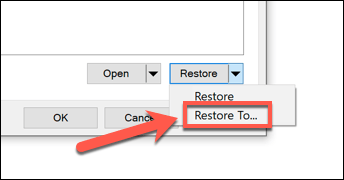
- If you select Restore, the previously saved files will overwrite the new files. To save both copies, select the downwards arrow next to the Restore button first, then choose Restore To instead.
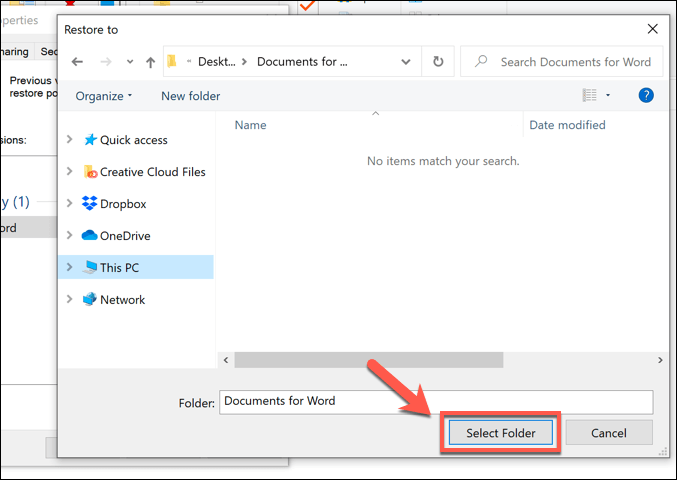
- Select a new folder to save the previous versions of your files, then select the Select Folder option.
Windows File Explorer will open to show you the restored files, whether you selected to overwrite the new copies or save them elsewhere instead. This option, as we’ve mentioned, only works if you had File History enabled before you made changes to files.
Unfortunately, there aren’t many options to help you restore previous versions in Windows 10 if you don’t already have a backup system in place. You may have more luck if you deleted the file, however, as Microsoft now offers a Windows File Recovery tool to help recover lost files.
Using Third Party File Versioning Software
Windows File History is a great option for file versioning, but it relies on using an external drive for backups, and backups are limited to every 15 minutes. While it does support network drives, support for this does seem to be more problematic, depending on how your network is configured.
With that in mind, you may prefer to use third-party file versioning software instead. While paid options exist, one of the simplest file versioning apps for Windows is AutoVer, a free app that will allow you to regularly back up your files to external drives, network attached storage drives, and offsite FTP servers.
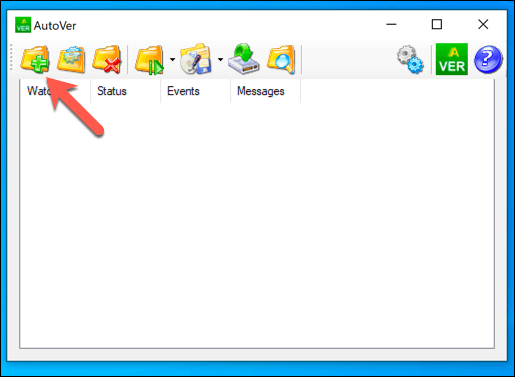
- To start, download and install AutoVer on your Windows PC. Once the software is installed, you can begin to monitor certain folders by selecting the Add New Watcher icon in the AutoVer client.
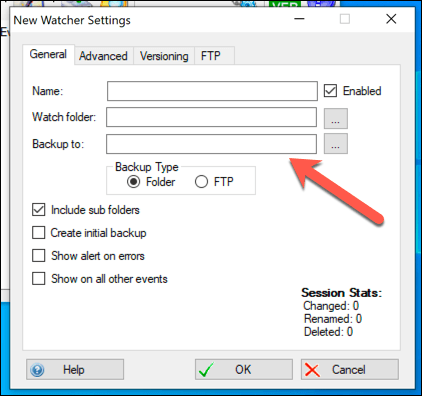
- You’ll need to identify the folder you wish to monitor, as well as the location to save the file backups. Provide a name for your monitor rule in the Name box. Under Watch Folder, provide the location of the folder or drive you wish to monitor. Finally, provide a location to save the backups in the Backup To box. You can choose to use a local backup location like an external drive, or switch to backup files over FTP, by choosing between the Backup Type options.
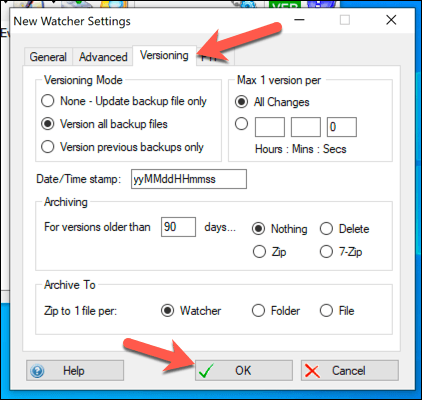
- In the Versioning tab, you can select how long you wish to save your backup files for. If you plan on backing up to a remote server, you can set your FTP connection settings in the FTP tab. Once you’re happy with the changes, select the OK button to save your changes.
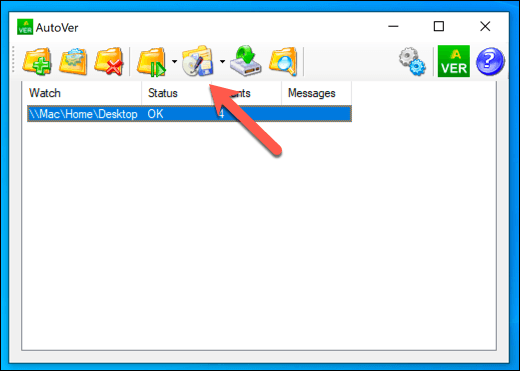
- AutoVer will automatically back up any changes to your files, almost as soon as you make changes. To run the watcher rule immediately and begin a new backup, however, select the Synchronize the selected Watcher (Backup now!) button.
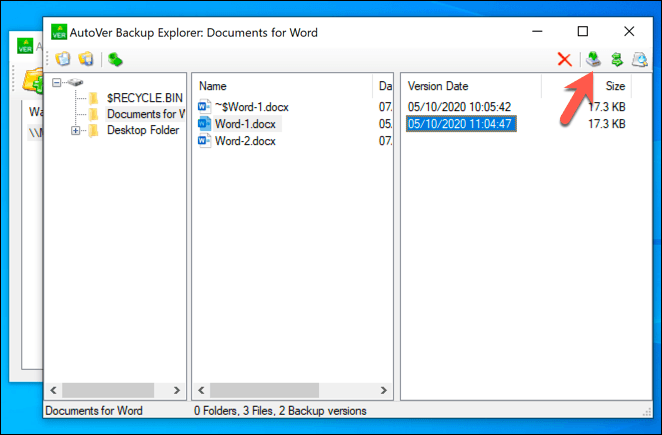
- If you want to view backed up files, you can do so by right-clicking the watcher rule and selecting the Explore backups option. This will open AutoVer File Explorer, allowing you to view the files that have been saved. If you want to restore an earlier version of a file, you can select one of the versions of it, selecting a dated version in the right-hand column, then selecting the Restore File button.
While AutoVer may look a little dated, it works incredibly well in regularly backing up your files and giving you a third-party option for file versioning in Windows 10. Files are backed up almost immediately, letting you quickly recover changes to files that may have been changed by mistake.
While cloud storage services like Google Drive are alternative options, you’re limited to how often versions of the file can be stored for. This makes unlimited file versioning, like those offered by AutoVer, a superior solution for long-term backups.
Keeping Your Windows 10 Files Safe
Your PC won’t last forever, so it’s important to always have a backup system in mind for Windows. Restoring previous versions of files in Windows 10 is much easier if you begin using offsite cloud storage, like Google Backup and Sync, to store copies of your files.
If you’re only worried about rolling back small changes, however, then Windows’ built-in file history should work well, but you can save versions of files more regularly using tools like AutoVer. If you’ve deleted files by mistake, you may be able to retrieve them using third-party software like Shadow Explorer.
from Online Tech Tips


0 Comments