How to automatically deskew (straighten) a text image using OpenCV
Today I would like to share with you a simple solution to image deskewing problem (straightening a rotated image). If you’re working on anything that has text extraction from images — you will have to deal with image deskewing in one form or another. From camera pictures to scanned documents — deskewing is a mandatory step in image pre-processing before feeding the cleaned-up image to an OCR tool.
As I myself was learning and experimenting with image processing in OpenCV, I found that in the majority of tutorials you just get a copy-pasted code solution, with barely any explanation of the logic behind it. That’s just not right. We need to understand the algorithms and how we can combine various image transformations to solve a given problem. Otherwise we won’t make any progress as software engineers. So in this tutorial I will try to keep the code snippets to bare minimum, and concentrate on explaining the ideas that make it work. But don’t worry, you can always find the complete code in my GitHub repo by the link at the end of this article.
Deskewing algorithm
Let’s start by discussing the general idea of deskeweing algorithm. Our main goal will be splitting the rotated image into text blocks, and determining the angle from them. To give you a detailed break-down of the approach that I’ll use:
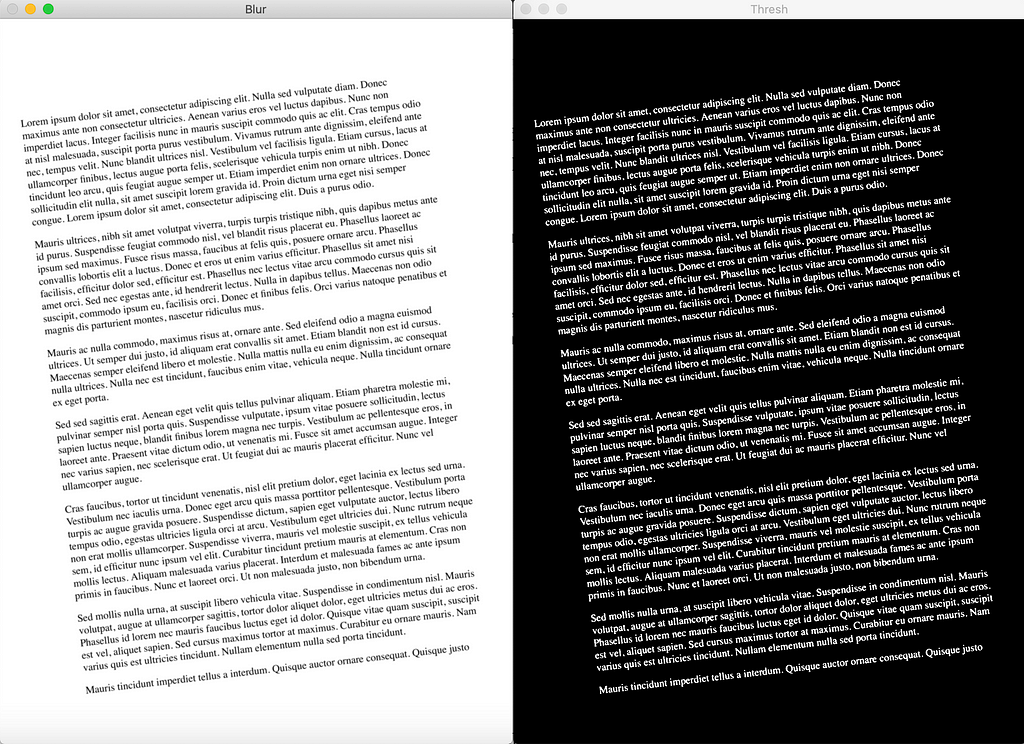
- Per usual — convert the image to gray scale.
- Apply slight blurring to decrease noise in the image.
- Now our goal is to find areas with text, i.e. text blocks of the image. To make text block detection easier we will invert and maximize the colors of our image, that will be achieved via thresholding. So now text becomes white (exactly 255,255,255 white), and background is black (same deal 0,0,0 black).
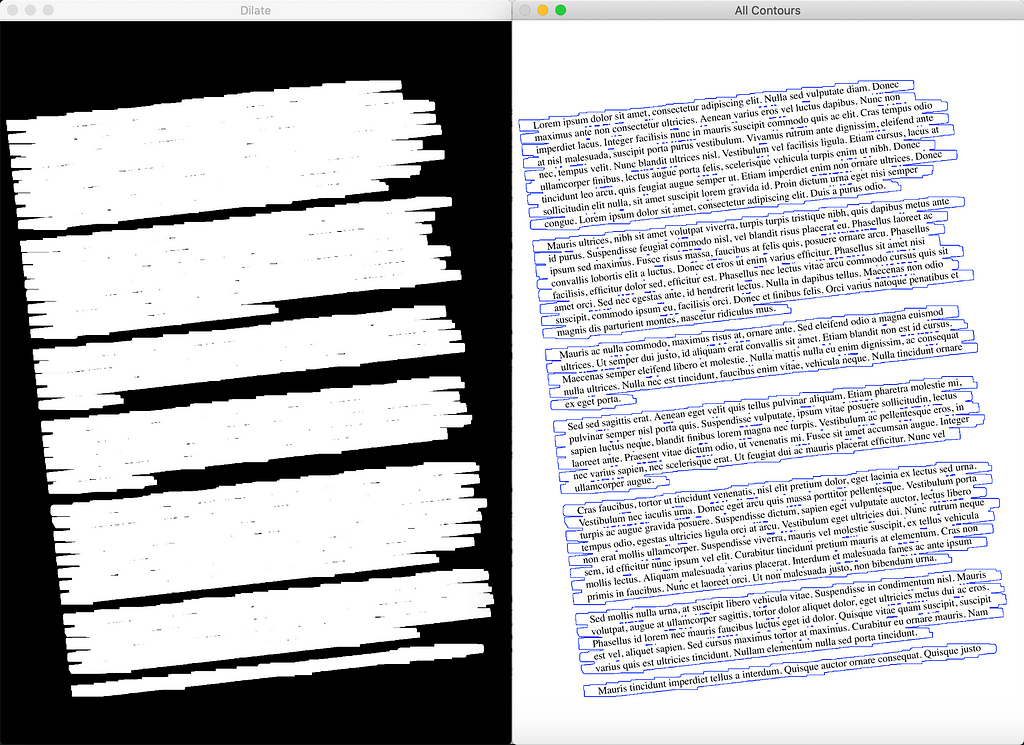
- To find text blocks we need to merge all printed characters of the block. We achieve this via dilation (expansion of white pixels). With a larger kernel on X axis to get rid of all spaces between words, and a smaller kernel on Y axis to blend in lines of one block between each other, but keep larger spaces between text blocks intact.
- Now a simple contour detection with min area rectangle enclosing our contour will form all the text blocks that we need.
- There can be various approaches to determine skew angle, but we’ll stick to the simple one — take the largest text block and use its angle.
And now switching to python code:
# Calculate skew angle of an image
def getSkewAngle(cvImage) -> float:
    # Prep image, copy, convert to gray scale, blur, and threshold
    newImage = cvImage.copy()
    gray = cv2.cvtColor(newImage, cv2.COLOR_BGR2GRAY)
    blur = cv2.GaussianBlur(gray, (9, 9), 0)
    thresh = cv2.threshold(blur, 0, 255, cv2.THRESH_BINARY_INV + cv2.THRESH_OTSU)[1]

    # Apply dilate to merge text into meaningful lines/paragraphs.
    # Use larger kernel on X axis to merge characters into single line, cancelling out any spaces.
    # But use smaller kernel on Y axis to separate between different blocks of text
    kernel = cv2.getStructuringElement(cv2.MORPH_RECT, (30, 5))
    dilate = cv2.dilate(thresh, kernel, iterations=5)

    # Find all contours
    contours, hierarchy = cv2.findContours(dilate, cv2.RETR_LIST, cv2.CHAIN_APPROX_SIMPLE)
    contours = sorted(contours, key = cv2.contourArea, reverse = True)

    # Find largest contour and surround in min area box
    largestContour = contours[0]
    minAreaRect = cv2.minAreaRect(largestContour)

    # Determine the angle. Convert it to the value that was originally used to obtain skewed image
    angle = minAreaRect[-1]
    if angle < -45:
        angle = 90 + angle
    return -1.0 * angle
Trending AI Articles:
1. Microsoft Azure Machine Learning x Udacity — Lesson 4 Notes
2. Fundamentals of AI, ML and Deep Learning for Product Managers
3. Roadmap to Data Science
4. Work on Artificial Intelligence Projects
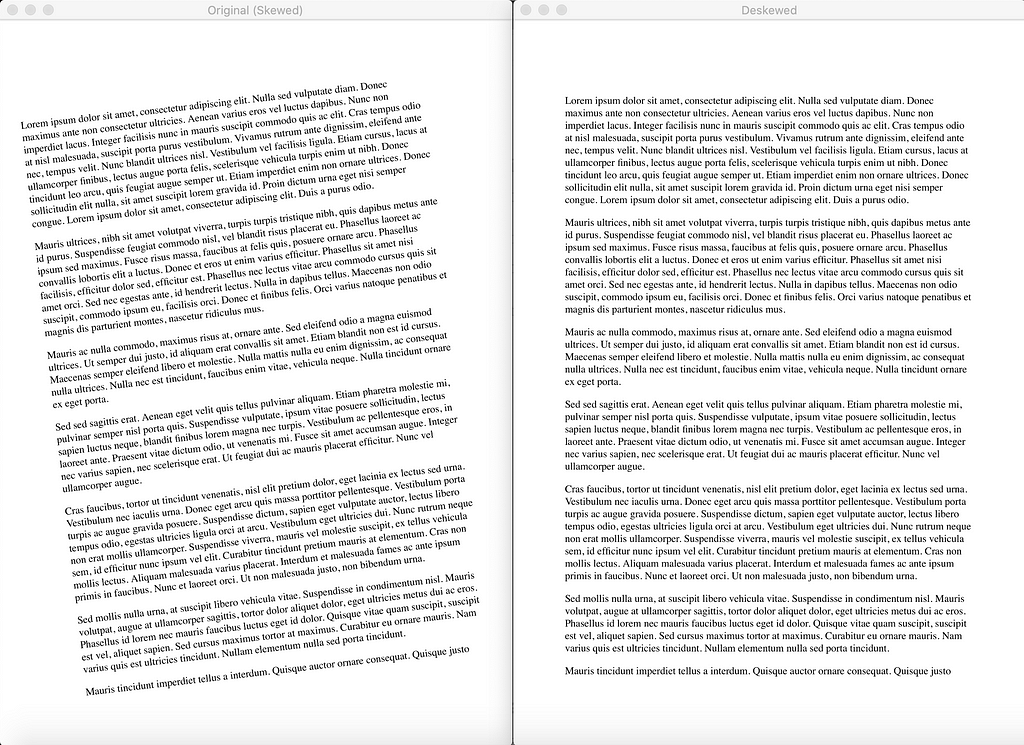
After the skew angle is obtained we just need to re-rotate our image:
# Rotate the image around its center
def rotateImage(cvImage, angle: float):
    newImage = cvImage.copy()
    (h, w) = newImage.shape[:2]
    center = (w // 2, h // 2)
    M = cv2.getRotationMatrix2D(center, angle, 1.0)
    newImage = cv2.warpAffine(newImage, M, (w, h), flags=cv2.INTER_CUBIC, borderMode=cv2.BORDER_REPLICATE)
    return newImage

# Deskew image
def deskew(cvImage):
    angle = getSkewAngle(cvImage)
    return rotateImage(cvImage, -1.0 * angle)
Visualizing the steps


Side note on angle calculation
Your case may require more advanced calculation than just taking the largest block, and there are a few alternative strategies you can start experimenting with.
1 — You can use the average angle of all text blocks:
allContourAngles = [cv2.minAreaRect(c)[-1] for c in contours]
angle = sum(allContourAngles) / len(allContourAngles)
2 — You can take the angle of the middle block:
middleContour = contours[len(contours) // 2]
angle = cv2.minAreaRect(middleContour)[-1]
3 — You can try the average angle of largest, smallest and middle blocks.
largestContour = contours[0]
middleContour = contours[len(contours) // 2]
smallestContour = contours[-1]
angle = sum([cv2.minAreaRect(largestContour)[-1], cv2.minAreaRect(middleContour)[-1], cv2.minAreaRect(smallestContour)[-1]]) / 3
That’s just some of the alternative ways I can instantly think of. Continue experimenting and find what works best for your case!
Testing
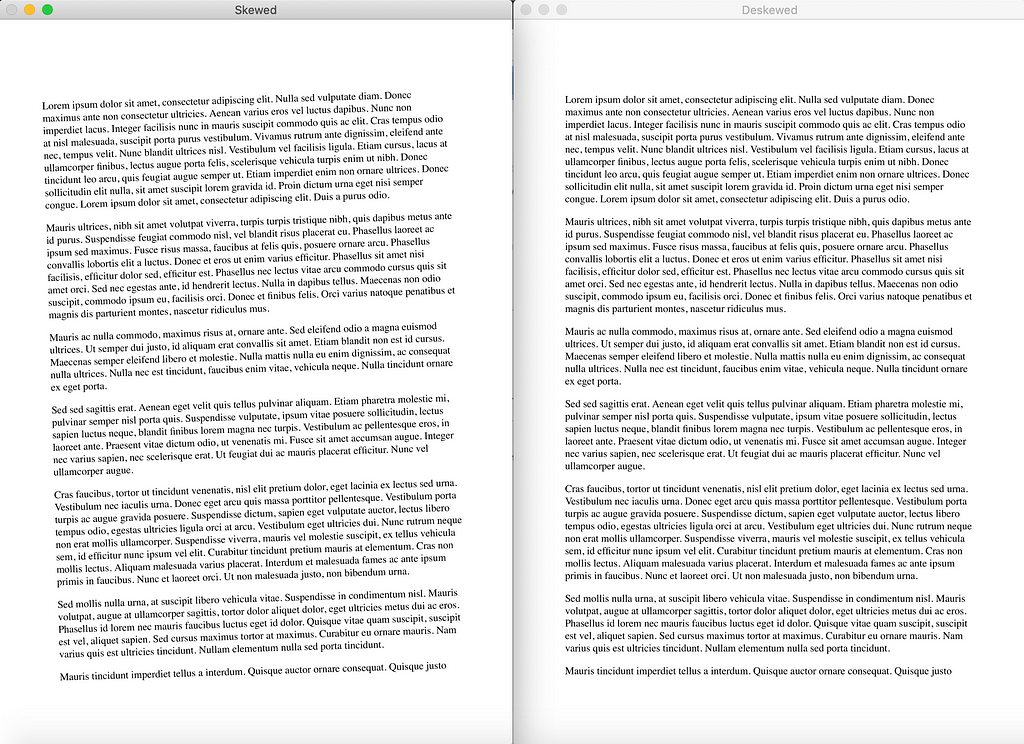
To test this approach I used a newly generated PDF file, with Lorem Ipsum text in it. The first page of this document was rendered with 300 DPI resolution (the most common setting when working with PDF documents). After that the testing dataset of 20 sample images was generated by taking the original image and randomly rotating it in the range from -10 to +10 degrees. Then I saved the images together with their skew angles. You can find all the code used to generate these sample images in my GitHub repo, I won’t go over it in detail here.
A sample statistics of testing results:
Item #0, with angle=1.77, calculated=1.77, difference=0.0%
Item #1, with angle=-1.2, calculated=-1.19, difference=0.83%
Item #2, with angle=8.92, calculated=8.92, difference=0.0%
Item #3, with angle=8.68, calculated=8.68, difference=0.0%
Item #4, with angle=4.83, calculated=4.82, difference=0.21%
Item #5, with angle=4.41, calculated=4.4, difference=0.23%
Item #6, with angle=-5.93, calculated=-5.91, difference=0.34%
Item #7, with angle=-3.32, calculated=-3.33, difference=0.3%
Item #8, with angle=6.53, calculated=6.54, difference=0.15%
Item #9, with angle=-2.66, calculated=-2.65, difference=0.38%
Item #10, with angle=-2.2, calculated=-2.19, difference=0.45%
Item #11, with angle=-1.42, calculated=-1.4, difference=1.41%
Item #12, with angle=-6.77, calculated=-6.77, difference=0.0%
Item #13, with angle=-9.26, calculated=-9.25, difference=0.11%
Item #14, with angle=4.36, calculated=4.35, difference=0.23%
Item #15, with angle=5.49, calculated=5.48, difference=0.18%
Item #16, with angle=-4.54, calculated=-4.55, difference=0.22%
Item #17, with angle=-2.54, calculated=-2.54, difference=0.0%
Item #18, with angle=4.65, calculated=4.66, difference=0.22%
Item #19, with angle=-4.33, calculated=-4.32, difference=0.23%
Min Error: 0.0%
Max Error: 1.41%
Avg Error: 0.27%
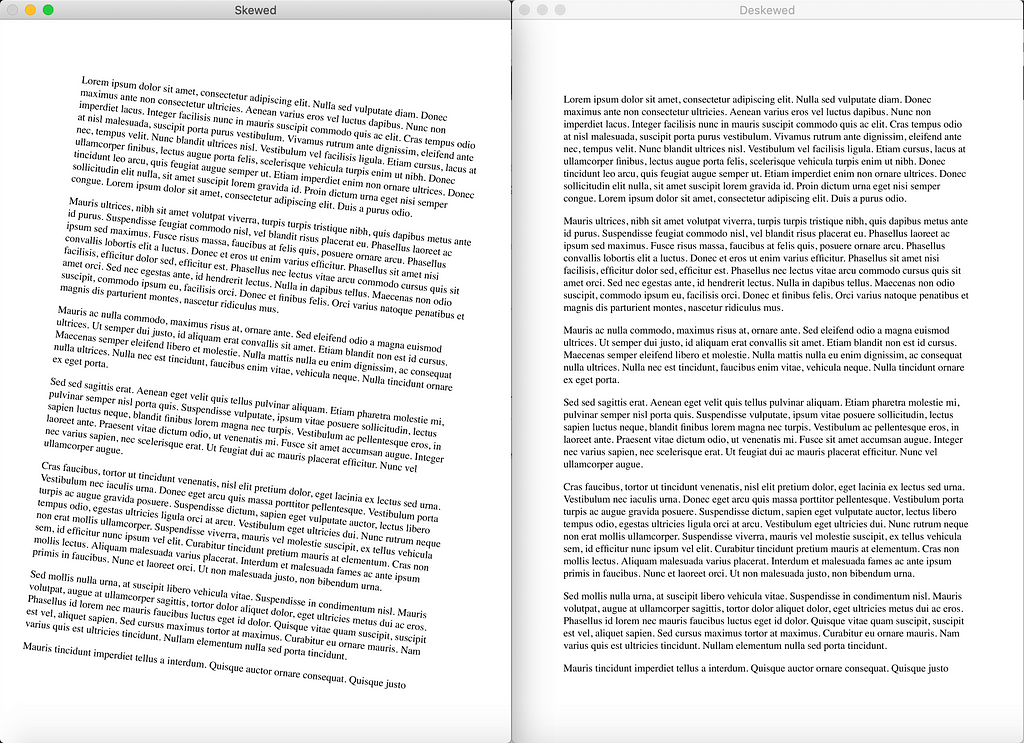
As you can see this approach works quite well, resulting in only minor digressions from the real skew angle. Such errors are no longer noticeable for the human eye and OCR engines.
That’s it for today! You can apply the solution I described to most deskewing cases, especially the ones that deal with scanned document processing. But again, every problem is unique, so take this as a starting point and improve upon these basic ideas.
Thank you all for reading this tutorial, I hope you found something useful in it. Good luck out there!
GitHub repo with source code:
Don’t forget to give us your 👏 !


How to automatically deskew (straighten) a text image using OpenCV was originally published in Becoming Human: Artificial Intelligence Magazine on Medium, where people are continuing the conversation by highlighting and responding to this story.
from Becoming Human: Artificial Intelligence Magazine - Medium


0 Comments